EMOS Dashboard
The EMOS Dashboard is a web app that runs on your robot. Once you open it in a browser, you can browse and install recipes, start and stop them, and watch what they do — all without touching a terminal. It’s the recommended way to use EMOS on a freshly unboxed robot.

What you get
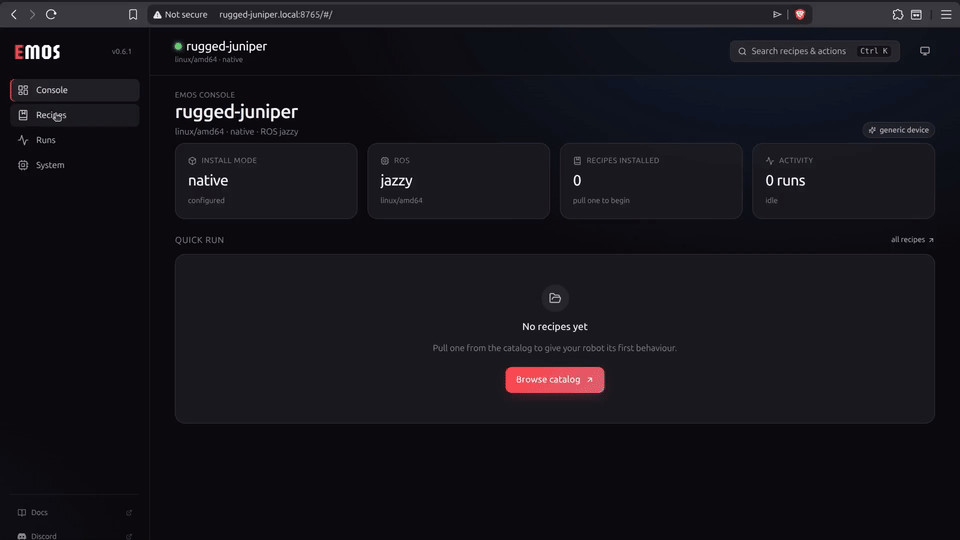
A home page that shows what your robot is, whether something is running, and one-click shortcuts to start a recipe.
A recipes library with a built-in catalog you can install from with one click.
A plugins catalog to install the robot plugin for your hardware in one click.
A live console that streams a recipe’s output as it runs.
A system page that tells you the robot’s name on the network, the URLs to open from other devices, and a QR code to scan with your phone.
You don’t need to install anything extra to use the dashboard — it ships with EMOS.
Open it for the first time
After you install EMOS, open a terminal on the robot and run:
emos serve
You’ll see a block like this:
EMOS DASHBOARD

Robot identity: rugged-juniper
Reach the dashboard from a browser:
  http://rugged-juniper.local:8765
  http://localhost:8765
  http://192.168.1.42:8765
  http://emos.local:8765

Pairing code (shown once): 482917
Save it now — it is not stored in plaintext on disk.

  ▄▄▄▄▄▄▄  ▄ ▄▄  ▄▄▄▄▄▄▄
  █ ▄▄▄ █ ▀▄ ██  █ ▄▄▄ █ ...
Three things to notice:
Robot identity — your robot has been given a friendly name (
rugged-juniperhere). This is how you’ll find it from your laptop or phone.The URLs — pick whichever one your laptop can reach. From the same Wi-Fi,
http://rugged-juniper.local:8765usually works directly. If.localdoesn’t resolve (most Android phones), use the IP address — e.g.http://192.168.1.42:8765.The pairing code — six digits, shown only on first launch. You’ll type it into the browser to grant that browser access.
Important
The pairing code is shown once. If you lose it, you can mint a new one any time with emos config rotate-pairing.
Pair the browser
Open one of the URLs in your browser. The dashboard notices it’s the first visit and shows a Pair screen — type the six-digit code from the terminal and you’re in. The browser remembers the pairing for ~90 days, so you won’t have to do this again unless you clear cookies, switch browsers, or revoke the access.
To pair a phone the same way, point its camera at the QR code that the terminal printed; the QR opens the same Pair screen with the code pre-filled.
Dashboard views
The dashboard has seven pages. The sidebar (or the command palette — press Ctrl+K / ⌘+K to open it) lets you jump between them.
Home
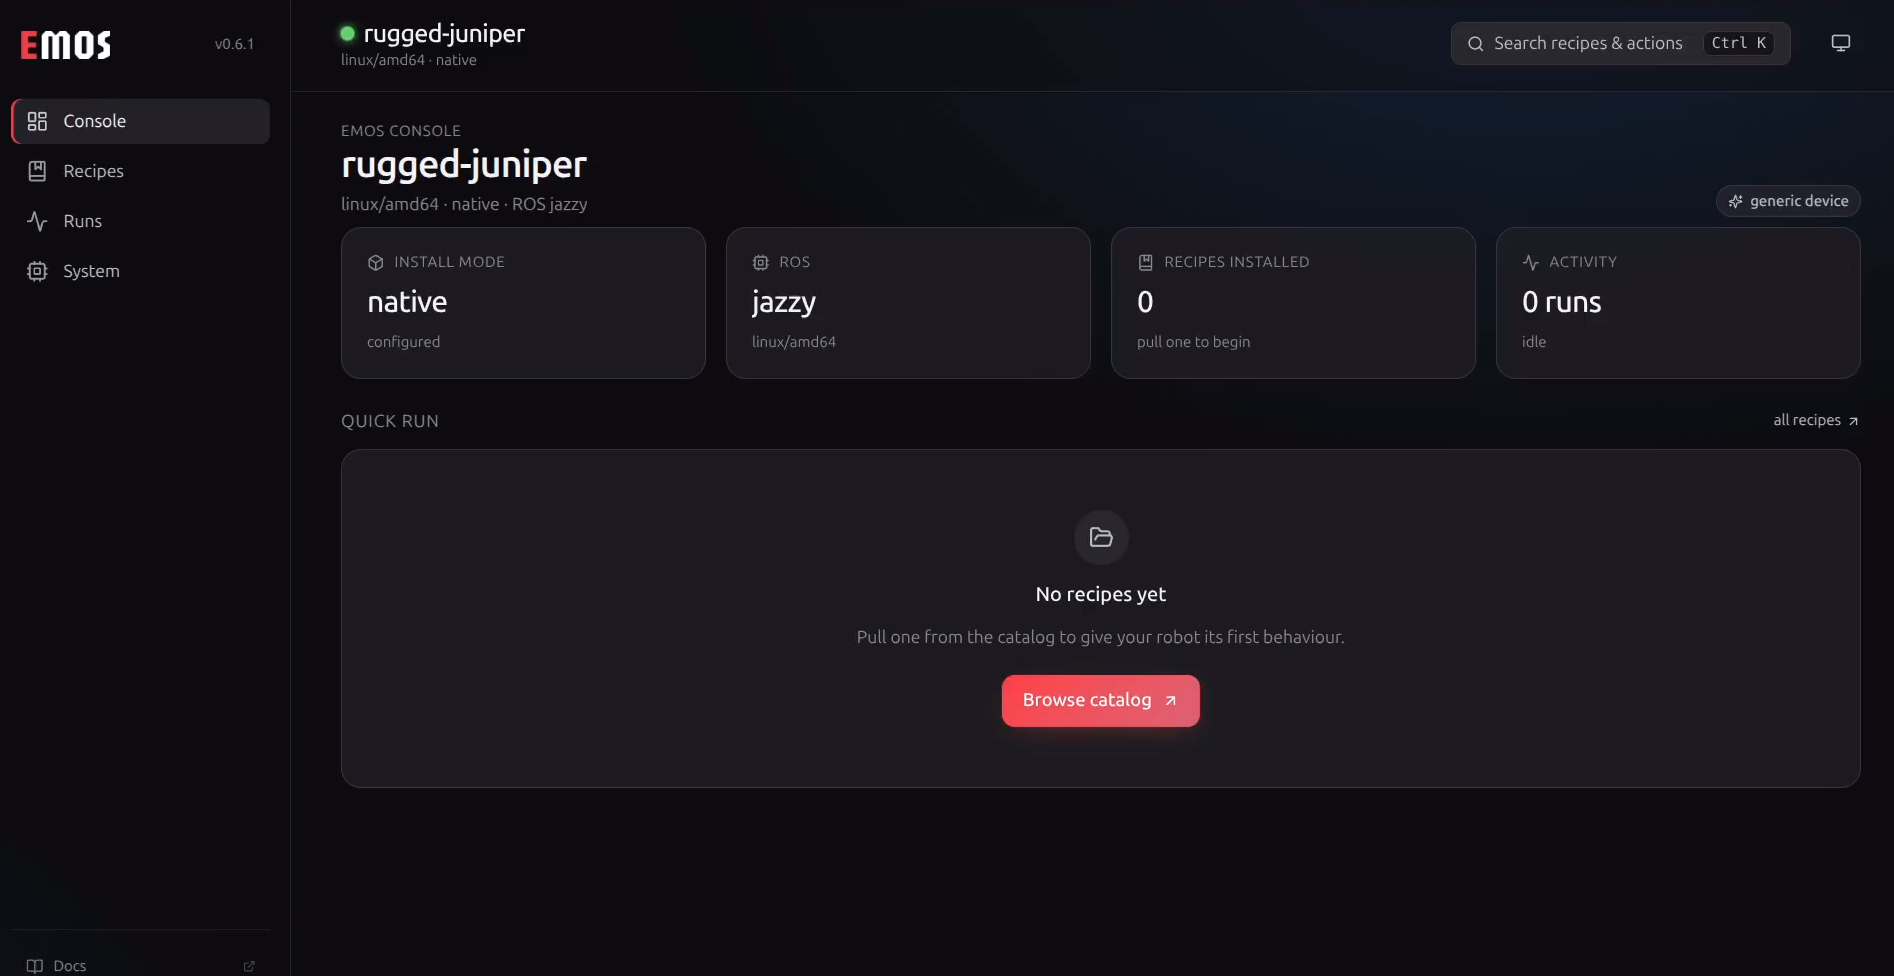
A one-glance view of the robot: identity, install status, how long it’s been up, and what (if anything) is running right now. If you haven’t installed any recipes yet, you’ll see a friendly card suggesting one to try first.
Recipes
The library, with two tabs:
Installed — what’s already on this robot.
Catalog — recipes published by Automatika that you can install with one click.
Tap Get on a catalog card and the recipe downloads in the background; the card fills in as it progresses and shows up under Installed when it’s done. If your robot is offline, the Catalog tab will tell you so — your already-installed recipes will keep working, you just can’t browse the catalog until the robot can reach the internet.
Tip
The bar at the top of the page shows whether your robot is currently online. It refreshes itself every few seconds, so you’ll know immediately if connectivity comes back.
Recipe Detail
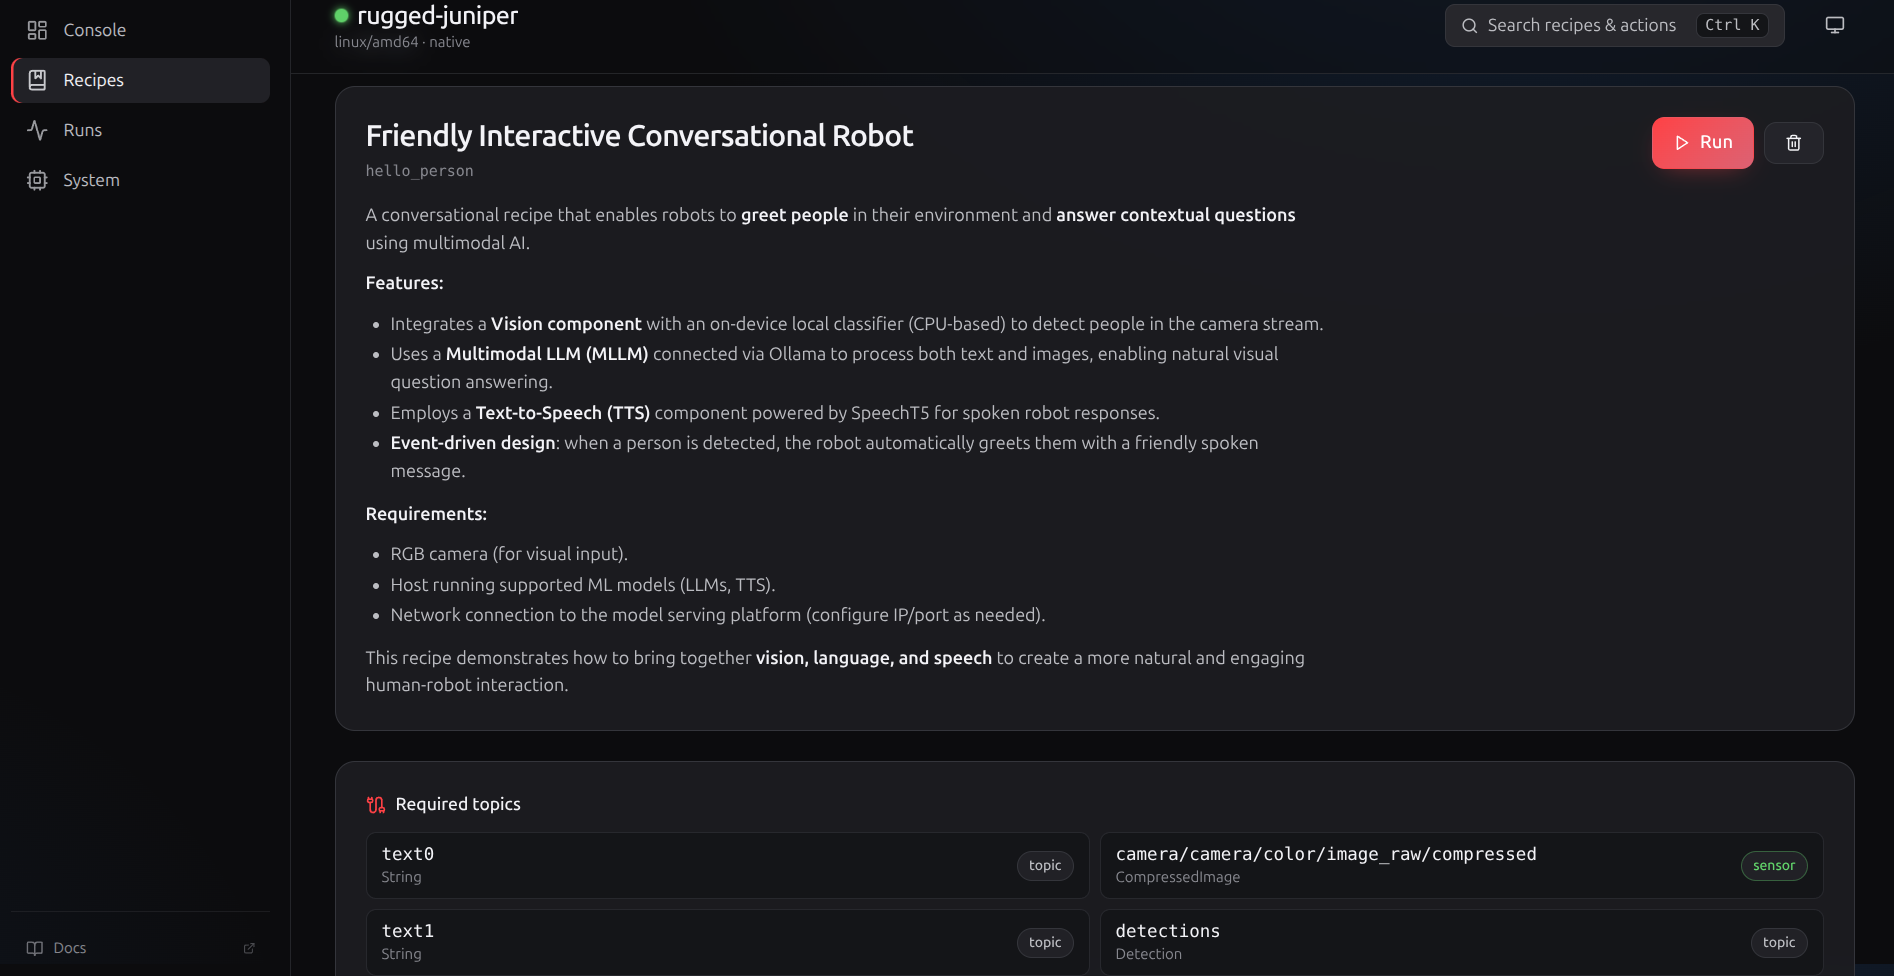
Click any installed recipe to see what it does. The page shows:
A short description.
The sensors the recipe expects (camera, lidar, microphone, …) — and, when relevant, suggested driver packages to install if a sensor is missing.
Recent runs of this recipe.
A Run button.
If a sensor your recipe needs isn’t connected, the run will warn you up-front rather than silently hanging.
Plugins
The catalog of robot plugins — the package that teaches EMOS how to talk to your specific robot. A robot runs one plugin at a time; the active one is shown at the top.
Browse the published plugins, each with its vendor, picture, and description.
Tap Install on a card to fetch, build, and activate it. Progress streams live on the card the same way recipe pulls do; the active plugin then powers the robot identity on the System page.
Reinstall or Remove the active plugin from the same page.
Installing here is the browser equivalent of emos plugin install. For the full flow and the CLI commands, see Robot Plugins.
Runs
A timeline of every recipe you’ve run recently. Click any row to open its console.
Run Console
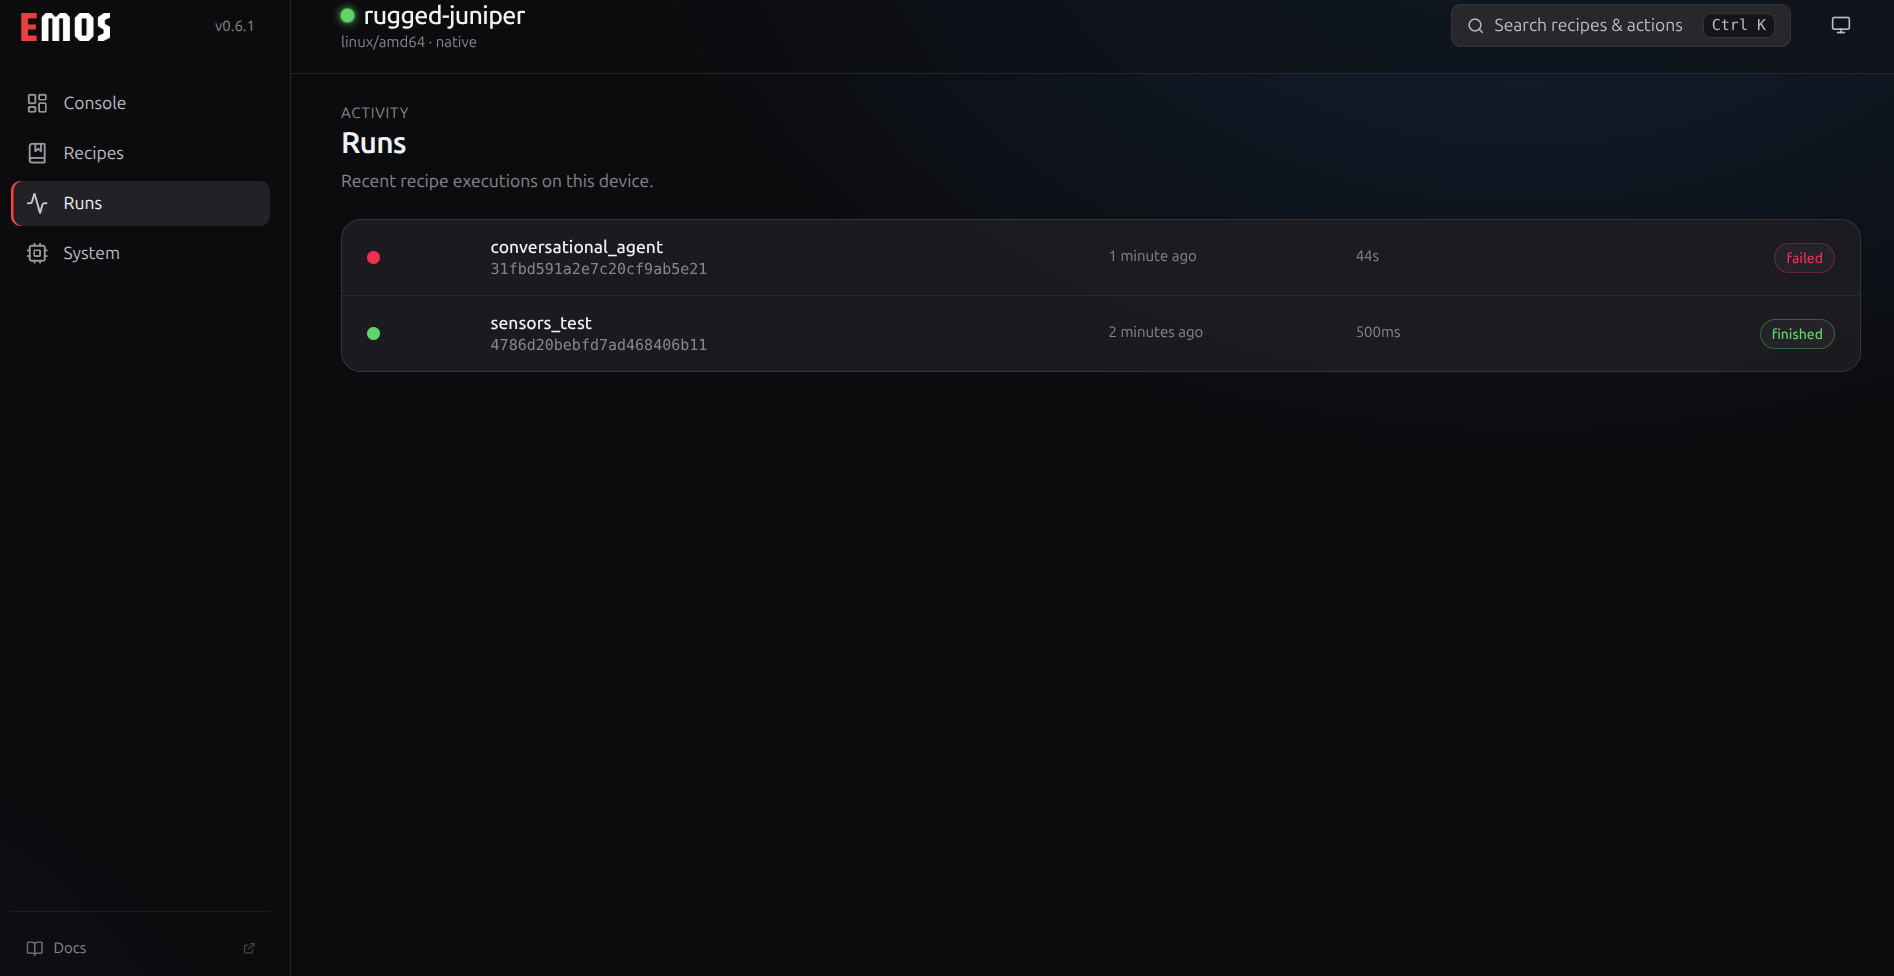
The live view of a running recipe. Output streams in real time, with colour and a follow-tail toggle so you can scroll back without losing your place. Closing the browser tab does not stop the recipe — there’s a Stop button for that.
The status pill at the top tells you whether the recipe is starting up, running, finished, failed, or was cancelled.
System
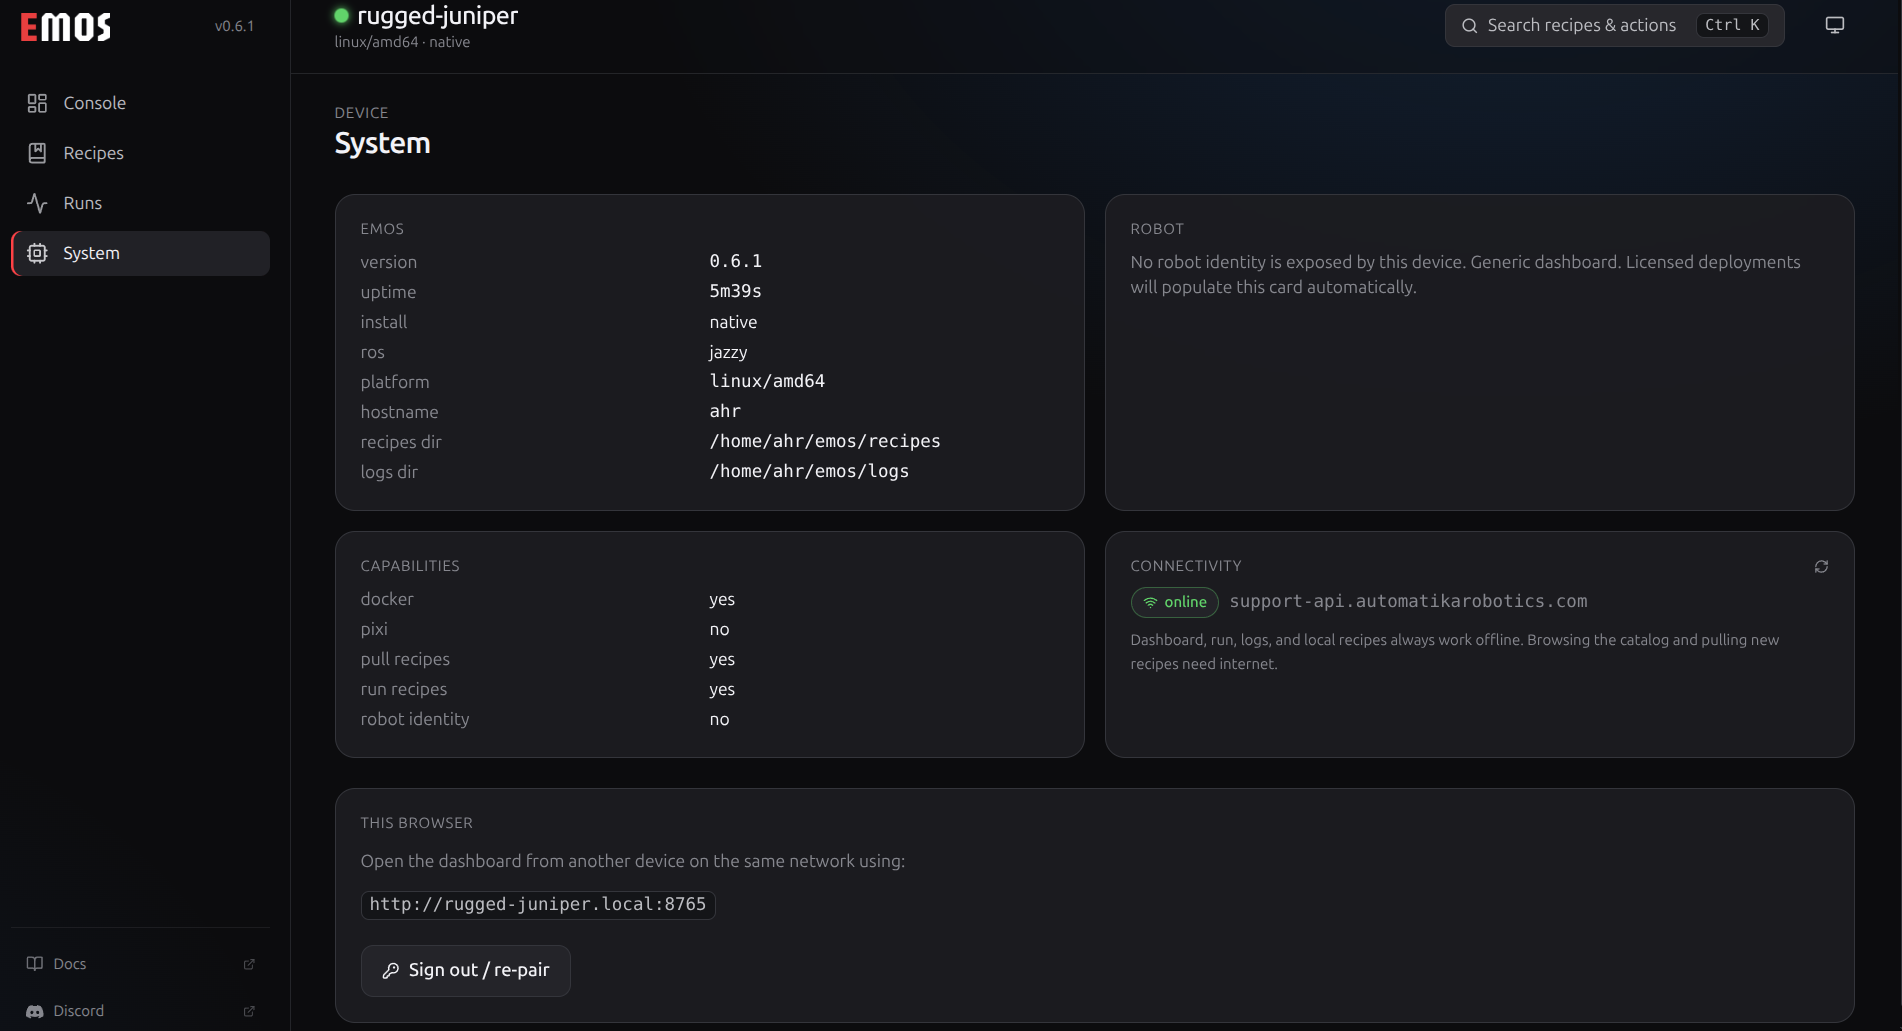
This is the page you’ll want when you need to invite a phone or another laptop to the same robot. It shows:
The robot’s name and how to reach it (mDNS name, IP addresses).
A QR code to scan from another device — opens the same Pair screen on that device.
A list of paired browsers (you can revoke any of them).
Robot install info (mode, ROS distribution, version) and a button to copy any field.
The active robot, when a plugin is installed: its picture, model, vendor, and the actions and events it exposes. Your robot keeps its unique EMOS name as the title — the plugin’s name is shown as the model alongside it.
Inviting another phone or laptop
Open the System page on a device that’s already paired, and either:
Have the new device scan the QR code, or
Type the code into the new device’s browser at the same URL.
Both devices end up paired against the same robot.
I lost the pairing code
The robot doesn’t keep the code in readable form on disk for security reasons. To issue a new one:
emos config rotate-pairing
Already-paired browsers stay paired — this just creates a fresh code for the next device that wants in.
Make the dashboard start automatically
If you’d rather not run emos serve by hand each time, ask the robot to run it at boot:
sudo emos serve install-service
The emos install flow already offers to do this for you. To turn it off later:
sudo emos serve uninstall-service
Naming your robot
Every robot is given a friendly name on first boot — rugged-juniper, swift-eagle, that kind of thing. It survives reboots and reinstalls so you can always type http://<name>.local:8765 and find it. To pick your own:
emos config set name happy-robot
sudo systemctl restart emos-dashboard.service   # if running at boot
Manage paired devices
To see who has access to your robot:
emos config tokens
To remove a single device by its label or short ID:
emos config revoke-token phone
To revoke everyone at once and start over:
emos config rotate-pairing # fresh code; existing tokens still valid
Tip
You can also see and revoke paired devices from the dashboard’s System page.
A note on browser security warnings
The dashboard runs over plain http:// by default, on your local network only. That’s the right default for a home or workshop — your robot is reachable to devices on your Wi-Fi but not to the wider internet, and the pairing code is what gates access.
If you’d like the lock icon in the browser address bar, there’s an opt-in HTTPS mode using a self-signed certificate — see HTTPS (Optional) in the CLI reference for setup, fingerprint verification, and how to add the certificate to your browser’s trust store so the warning goes away permanently.
See also
CLI Reference for the commands the dashboard runs under the hood. Advanced users who want to integrate with their own tools can look at internal/server/openapi.yaml for the dashboard’s REST API.
Trouble?
See also
Troubleshooting — the Dashboard section covers the common bumps: lost pairing code, can’t open emos.local, the dashboard says “not installed” even though I installed something, and similar.